To enable user import or Print/Scan integrations between Google Workspace and OptimiDoc Cloud, you must first create an internal Google application using the Google Cloud Console.
This application is authorised using OAuth 2.0, and OptimiDoc Cloud accesses Google services through secure API calls.
Follow the steps below to configure your Google Workspace environment.
1. Access Google Cloud Console
-
Sign in at:
https://console.cloud.google.com/ -
Log in using a Google Workspace administrator account.
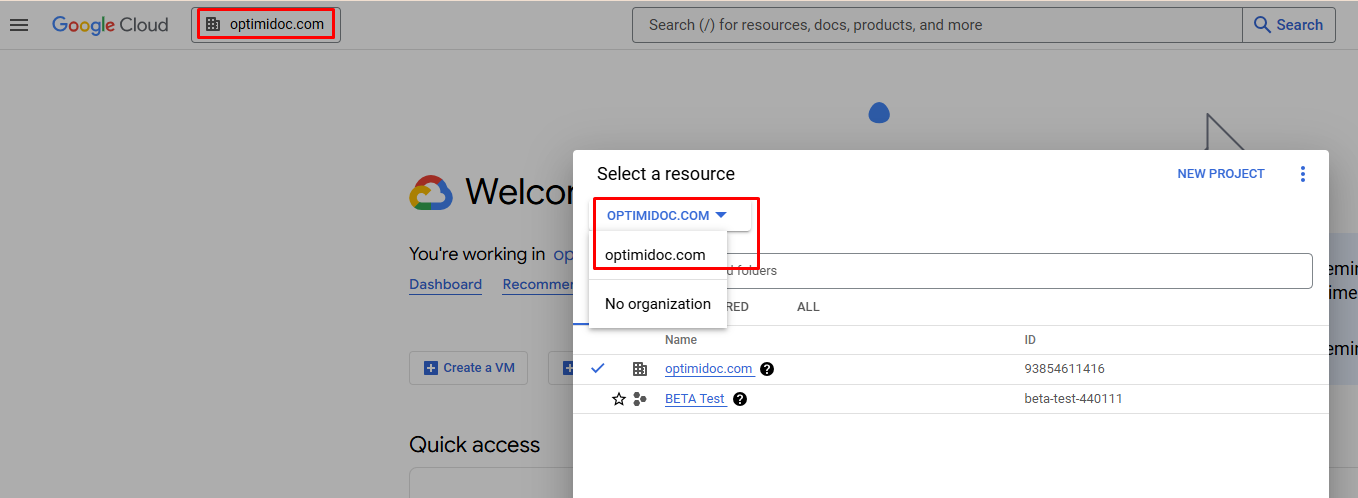
Important:
You must be logged into an organisation domain.
Running under “No organisation” will not allow internal application creation.
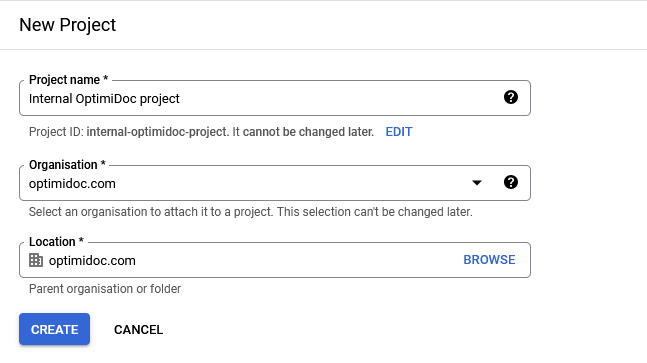
2. Create a New Project
-
Click Select project and choose New Project.
-
Enter the project name and required details.
-
Click Create.
-
Wait a few moments while Google creates the project.
-
Open the project once it becomes available.
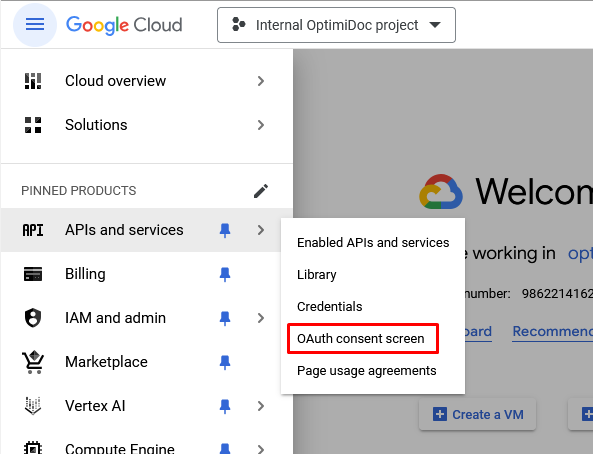
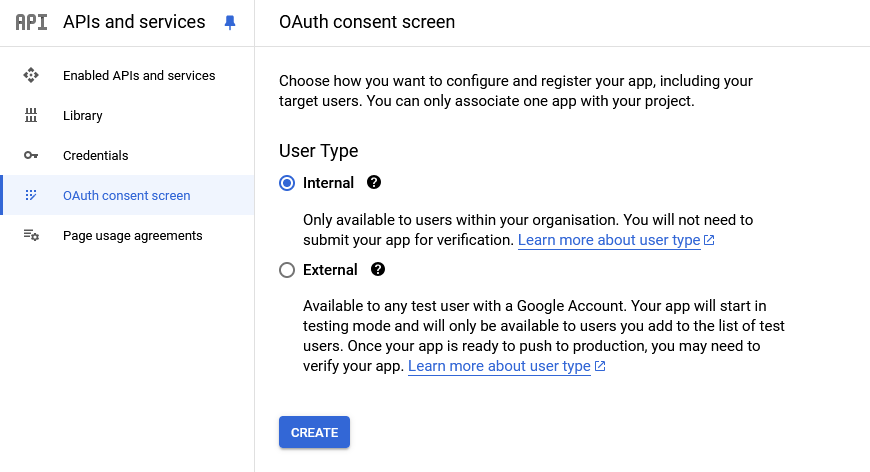
3. Configure OAuth Consent Screen
-
Navigate to APIs & Services → OAuth consent screen.
-
Select Internal as the application type.
-
Click Create.
-
Fill in the required details (App name, user support e‑mail, etc.).
-
Click Save and continue.
-
When asked for scopes:
-
No scopes are required at this stage.
-
Click Save and continue again.
-
-
On the final page, click Back to dashboard.
4. Create OAuth Client Credentials
-
Go to APIs & Services → Credentials.
-
Click Create Credentials → OAuth client ID.
-
Select Web application as the application type.
-
Add Authorised redirect URIs depending on your data centre:
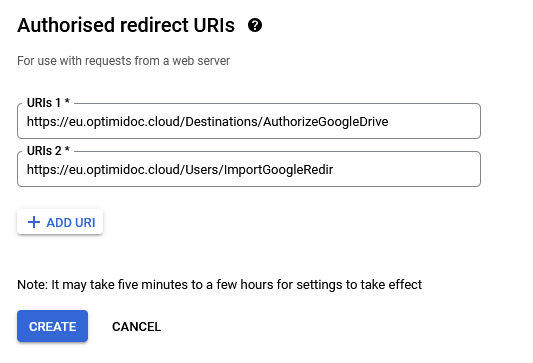
Authorised Redirect URIs
Replace eu with us or uk based on tenant location.
For Print/Scan integrations:
https://eu.optimidoc.cloud/Destinations/AuthorizeGoogleDrive
For User import:
https://eu.optimidoc.cloud/Users/ImportGoogleRedir
-
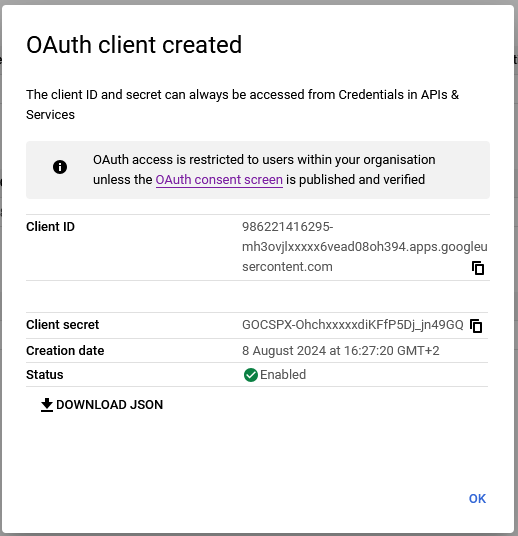
Click Create.
-
Copy the Client ID and Client Secret.
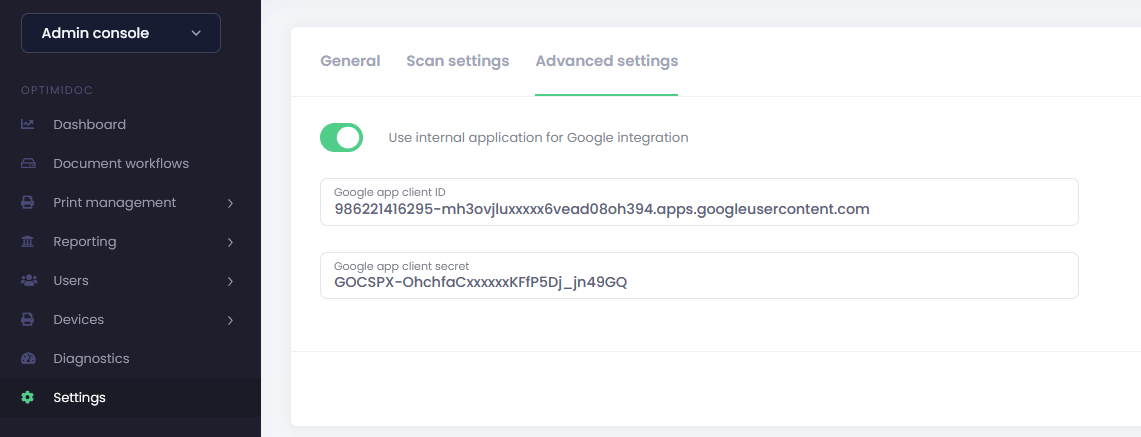
5. Add OAuth Credentials into OptimiDoc Cloud
-
Open OptimiDoc Cloud Admin Portal.
-
Navigate to Company Settings.
-
Paste the Client ID and Client Secret into the corresponding Google Workspace configuration fields.
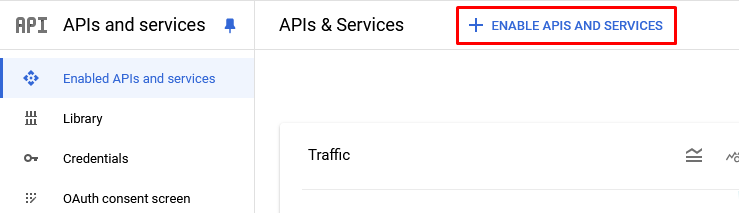
6. Enable Required APIs
In the Google Cloud Console, open APIs & Services → Library and enable:
-
Admin SDK API – required for User Import
-
Google Drive API – required for Print/Scan workflows
7. Authorise the Application in OptimiDoc Cloud
Depending on the functionality you are configuring:
-
Navigate to Document Workflows → for scanning destinations
-
Navigate to User Import → for user provisioning
Click the unauthorised key icon, select your Google admin account, and allow the application access.
Once authorised:
-
Scanning destinations will be operational
-
Print workflows can be used
-
User import from Google Workspace will be enabled
Troubleshooting “App Blocked” Issue
If Google blocks the application during authorisation, follow these steps:
1. Open Admin Console
Navigate to:
Security → API Controls → App Access Control
Check whether the OptimiDoc Cloud app is listed.
2. If the App Is Not Listed
-
Click Configure new app.
-
Choose OAuth App Name or Client ID.
-
Search using this Client ID:
478856714290-eqgi9q9jj73qk8qmjlha c g5bohehcpcr.apps.googleusercontent.com
-
When found, add the application.
3. Enable and Verify the Application
Once added:
-
Enable the application for the entire organisation.
-
Verify access.
-
Confirm it appears under “App Access Control”.
After verification, the application will no longer be blocked during authorisation.
Completion
After completing the above steps:
-
You can scan and deliver files to Google Drive.
-
You can print using Google‑authorised workflows.
-
You can import users from Google Workspace directly into OptimiDoc Cloud.