Groups in OptimiDoc Cloud provide a policy‑based mechanism for managing user access and configuration at scale. The system‑defined Everyone group establishes the baseline configuration and access rights that apply to all users within the tenant. Additional groups are used to modify these baseline permissions.
Within a group, administrators can define policy‑level controls and configuration bindings, including:
-
Colour printing restrictions
-
Enforced two‑sided print and copy policies
-
Assigned print connectors
-
Document workflow associations
Users and entire departments can be assigned to groups. A single user/department may be a member of multiple groups, allowing the user’s effective configuration and access rights to be composed from multiple group‑level policies.
Groups can be created manually within OptimiDoc Cloud or automatically during user import from an external identity. When groups are created automatically, users are assigned to the groups during the import process, and only the group‑level access rights and policies need to be configured.
Access Rights Evaluation
Access rights are evaluated starting with the baseline policies defined in the Everyone group. If a user or the user’s department is assigned to one or more additional groups, the policies defined in those groups are evaluated on top of the baseline configuration.
For example, if the Everyone group allows access to a specific document workflow, but another assigned group explicitly restricts that workflow, the user will not have access to it.
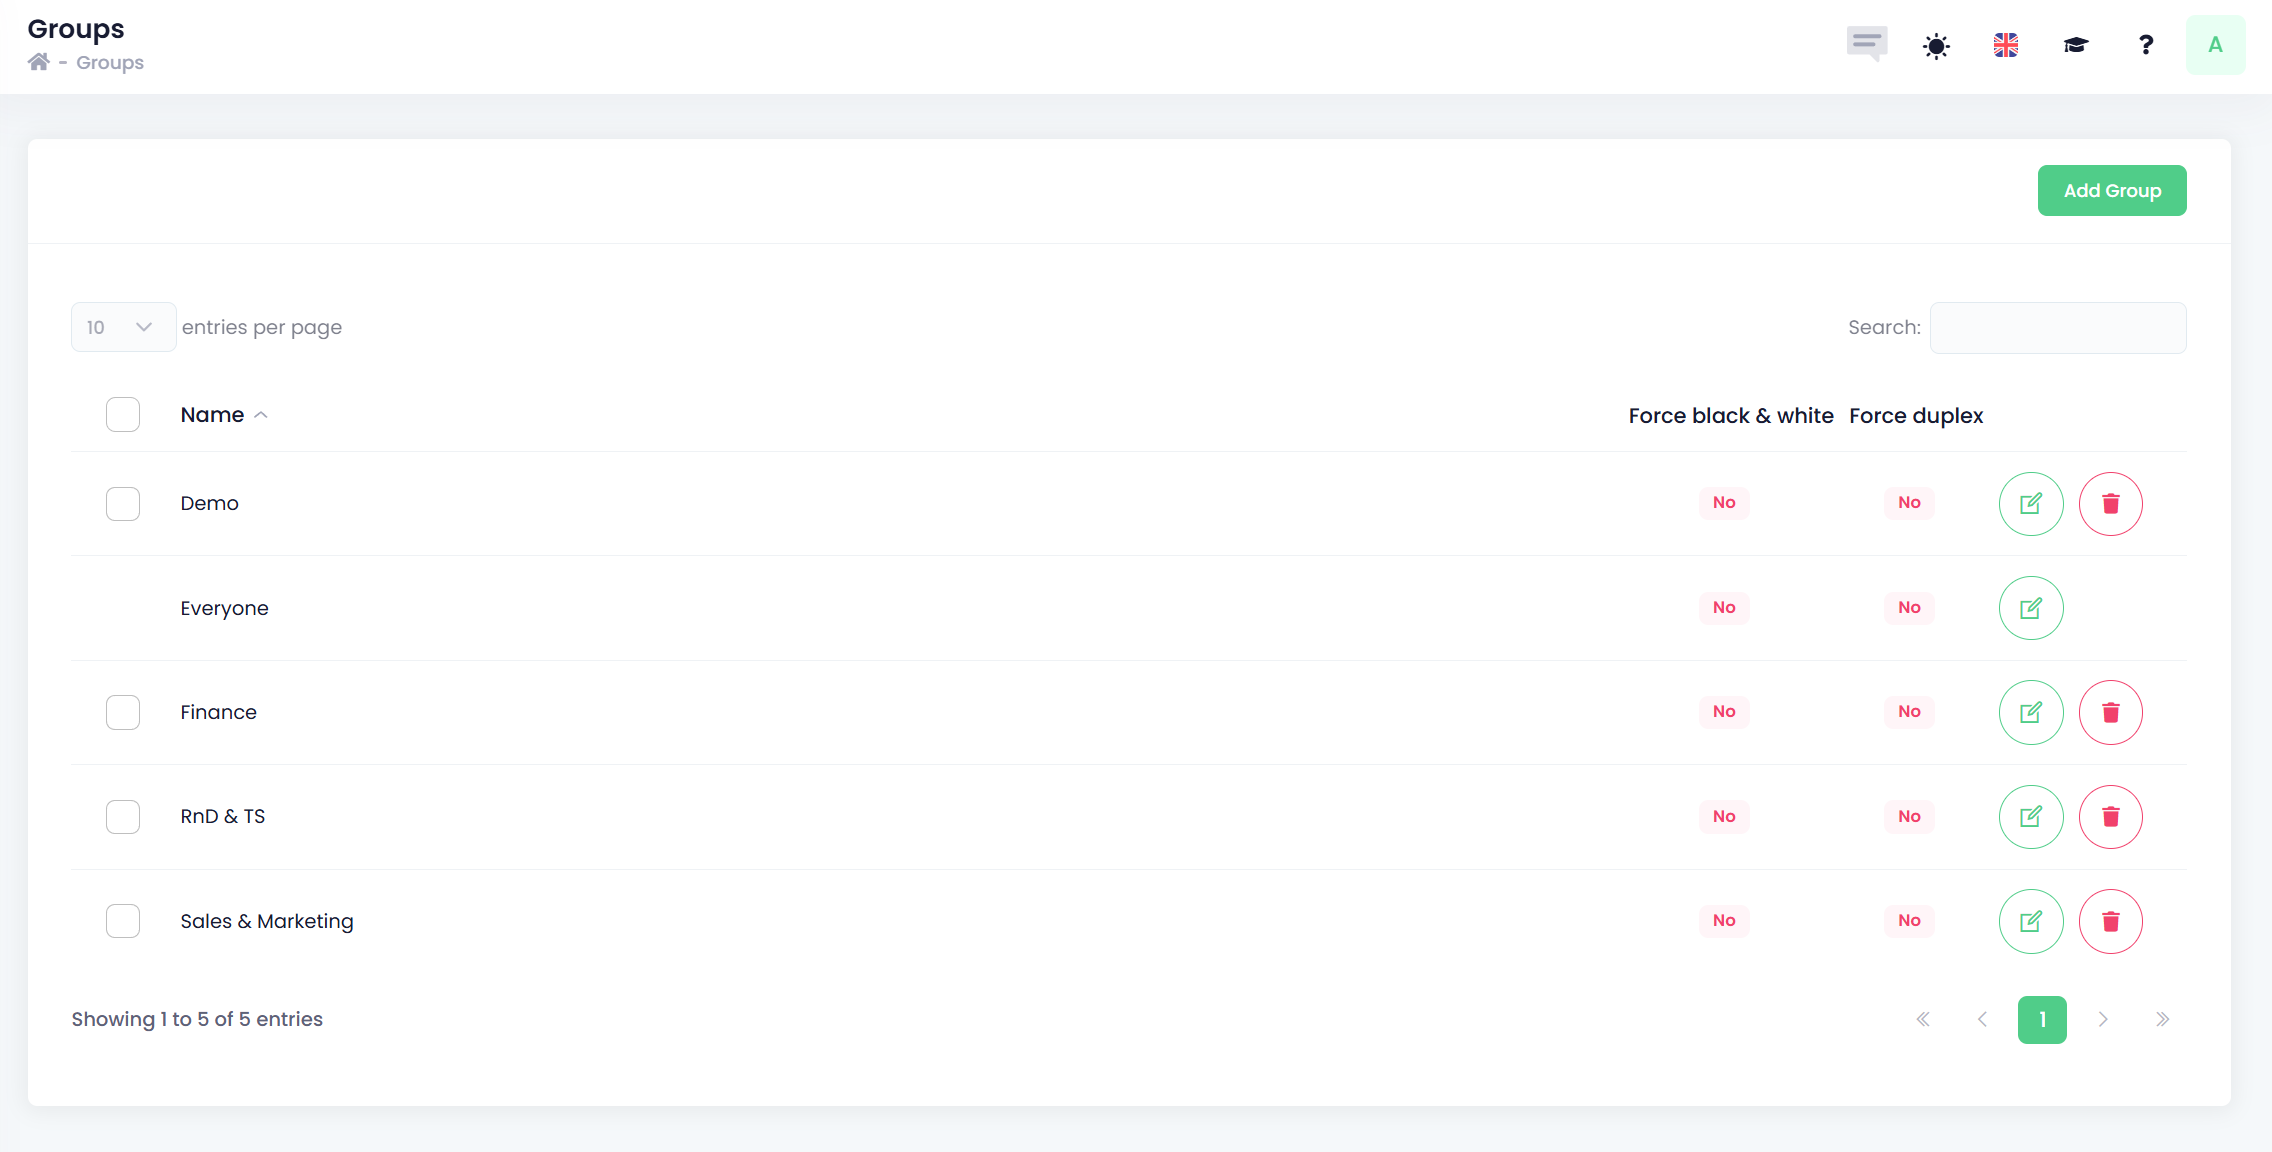
How to create a new group
-
From the Groups overview, click Add Group.
-
Fill in the Group information:
-
General
-
Name – Name of the group.
-
Force black & white – Enforces monochrome printing and copying for all users assigned to the group.
-
Force duplex – Enforces two‑sided (duplex) printing and copying for all users assigned to the group.
-
Please refer to the compatibility matrix to verify that the selected forcing options are supported by the printer manufacturer in use.
-
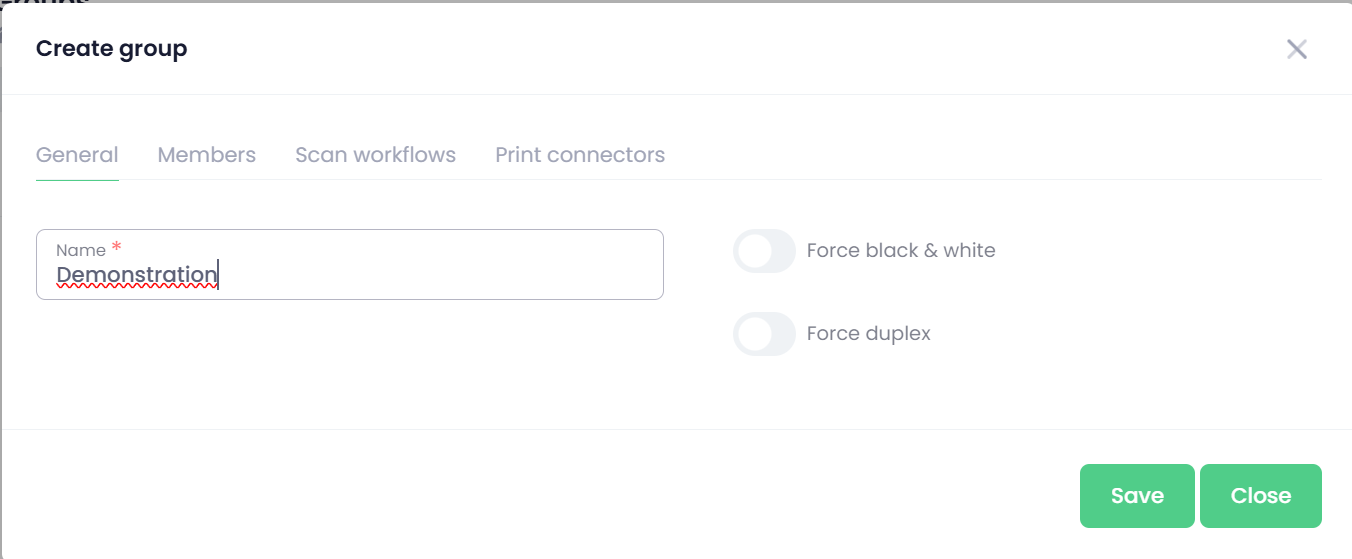
Members
-
Departments – Enter the name of the department you want to assign to the group. All users belonging to the selected department will inherit the group’s policies.
-
Users – Enter the name of the user you want to assign to the group.
Assigned members (users or departments) can be removed by clicking the trash icon next to the respective assigned member.
-
-
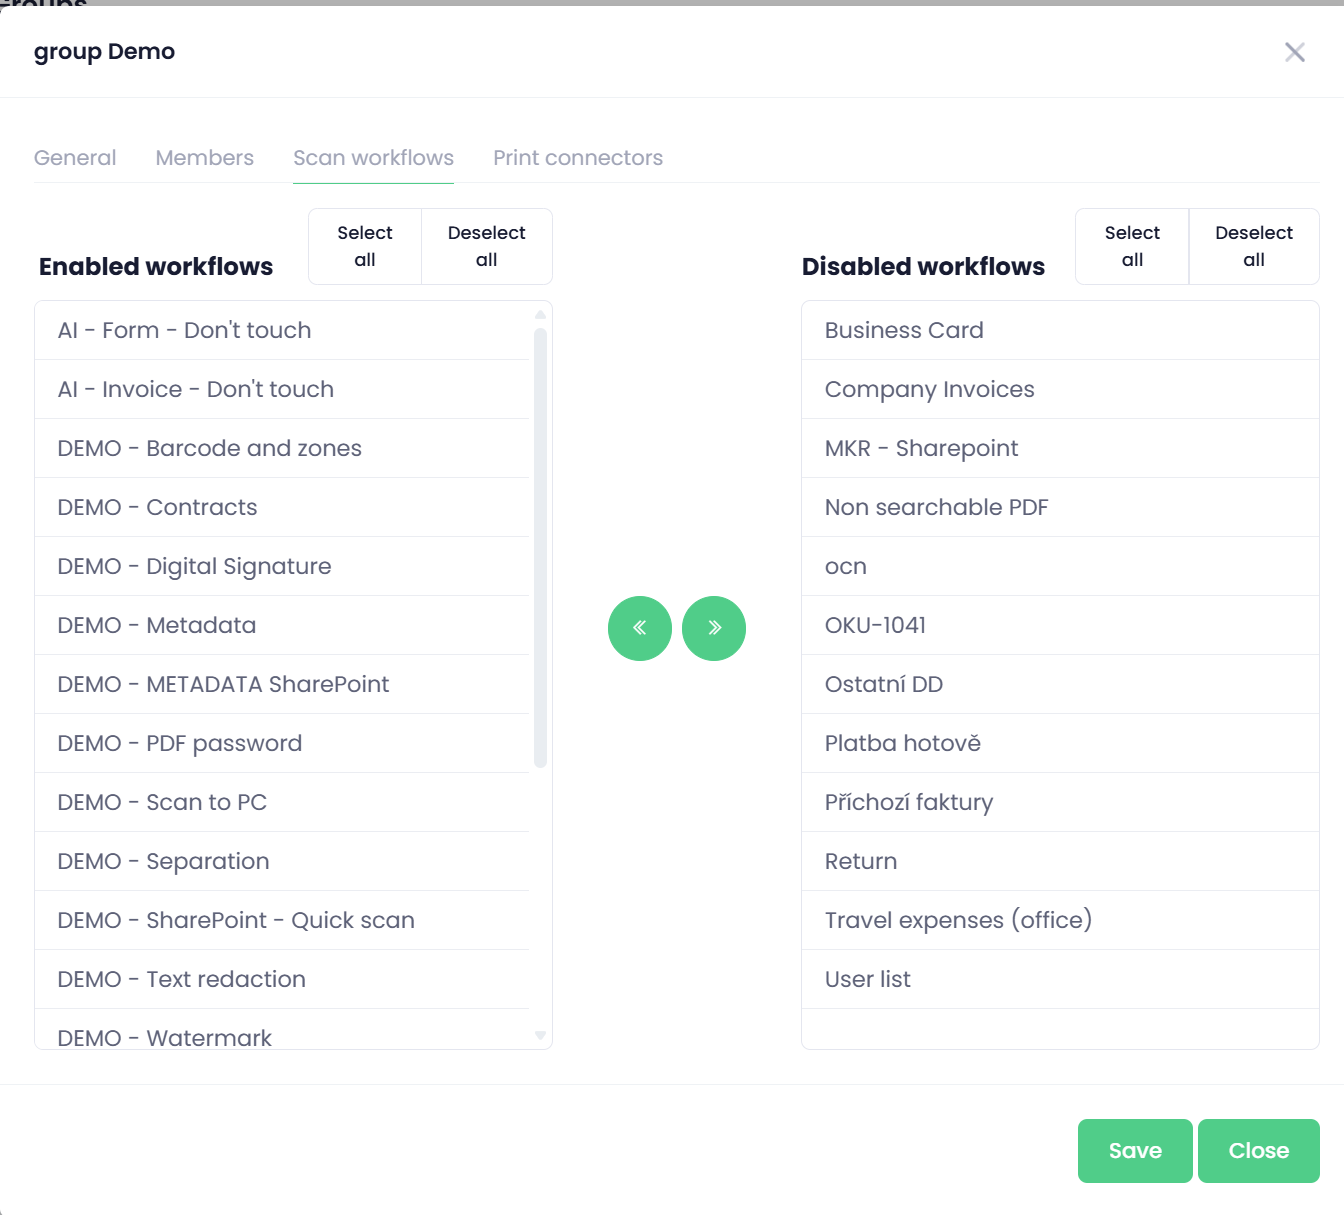
Scan workflows
-
Enabled workflows – Scan workflows that are explicitly enabled for this group.
-
Disabled workflows – Scan workflows that are explicitly disabled for this group.
You can modify workflow availability by selecting a workflow and moving it between the enabled and disabled lists using the arrow controls.
-
-
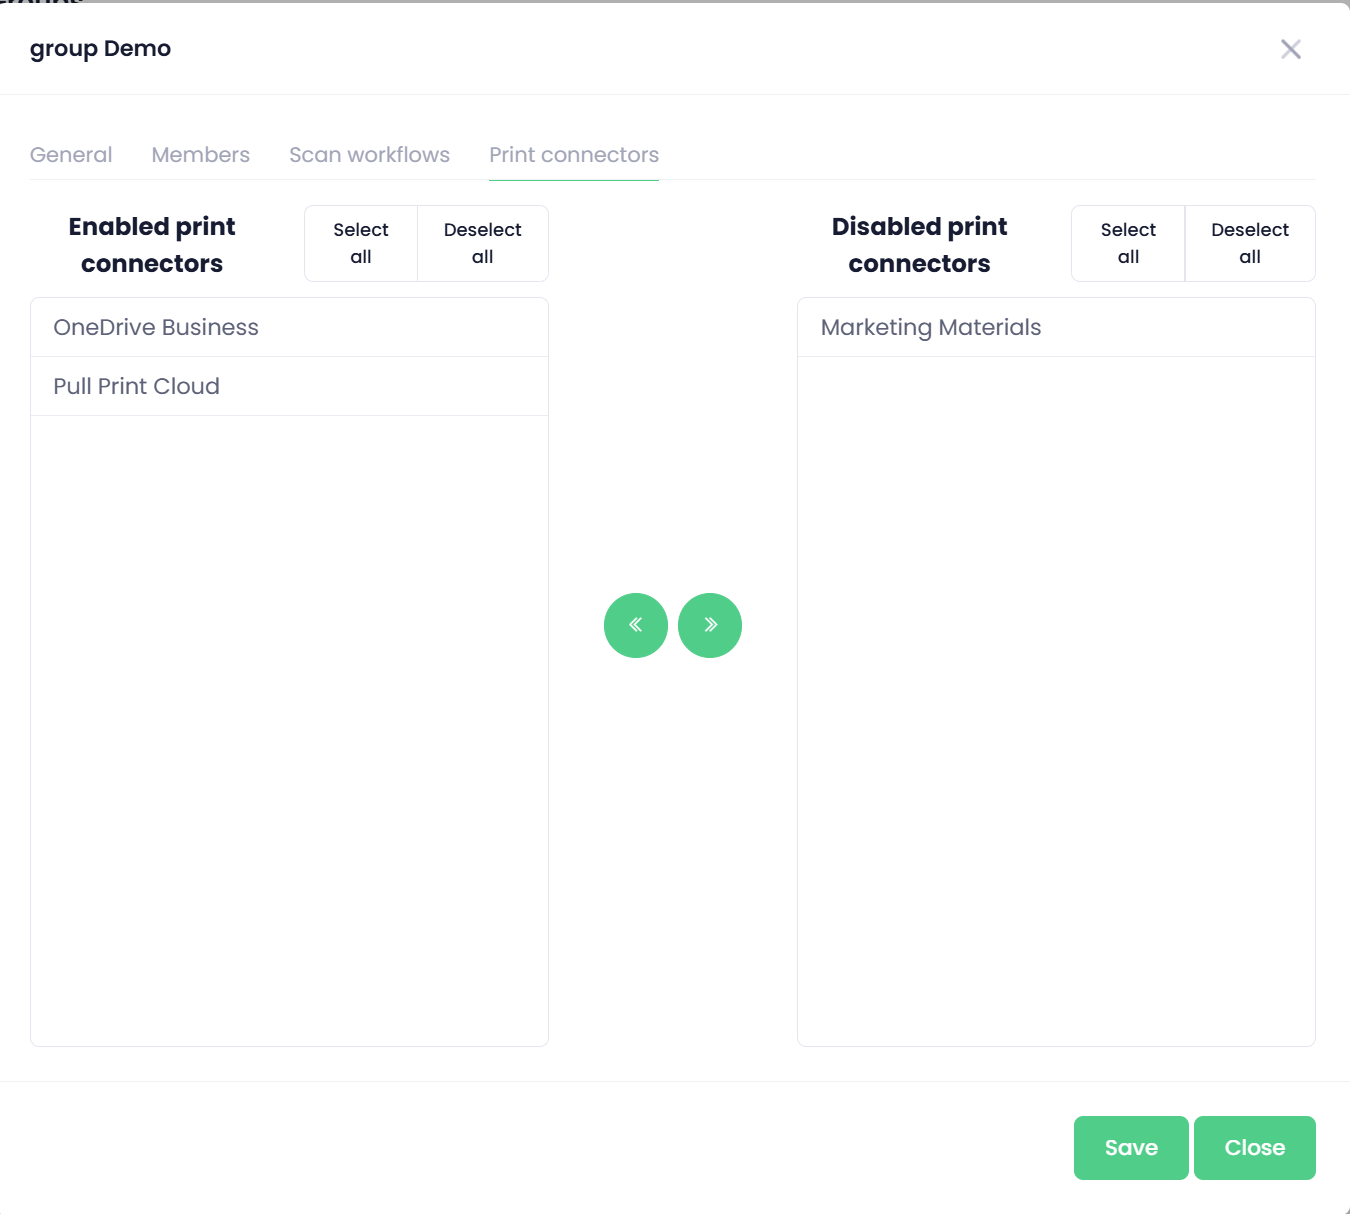
Print connectors
-
Enabled print connectors– Print connectors that are explicitly enabled for this group.
-
Disabled print connectors– Print connectors that are explicitly disabled for this group.
You can modify connector availability by selecting a workflow and moving it between the enabled and disabled lists using the arrow controls.
-
Bulk operations
Multiple operations can be performed on one or more users directly from the Users list.
To perform an operation, select one or multiple users and then choose the required action from the top menu.