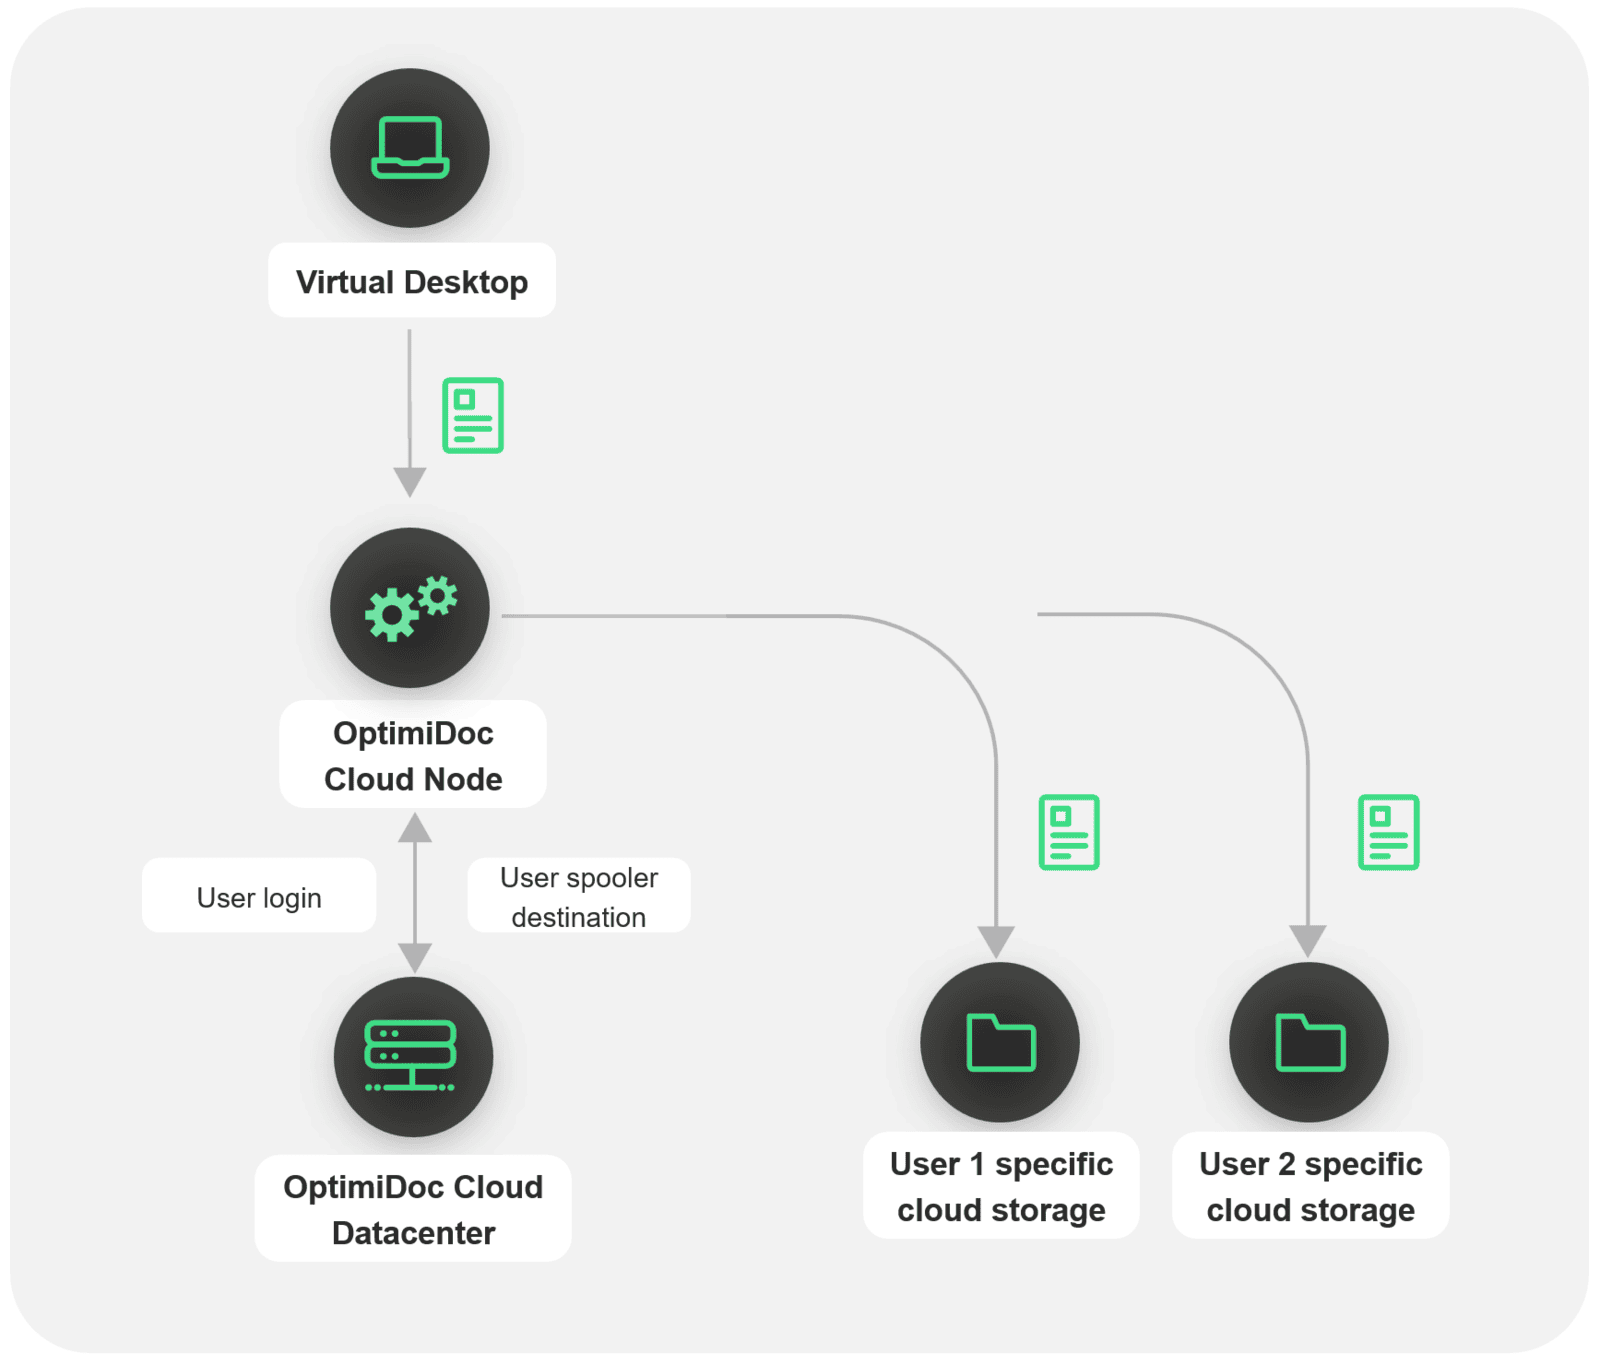
OptimiDoc Cloud Node (OCN) supports printing from shared workstations and virtual desktop environments (VDI). In this scenario, the OCN acts as a print proxy, enabling reliable print job submission and delivery across dynamic user sessions.
How It Works
-
Job submission – Print jobs are submitted from a virtual desktop or shared workstation to the OCN.
-
User verification – The OCN recognizes the user and communicates with the OptimiDoc Cloud datacentre to validate the user’s identity.
-
Spooler resolution – If the user is recognised, the datacentre returns the appropriate spooler destination.
-
Job delivery – The OCN routes the print job to the resolved destination, either user cloud storage or the OptimiDoc Cloud datacentre.
The OCN needs to be installed directly on a shared workstation or on a VDI server.
How to enable printing from SharePC and VDI
-
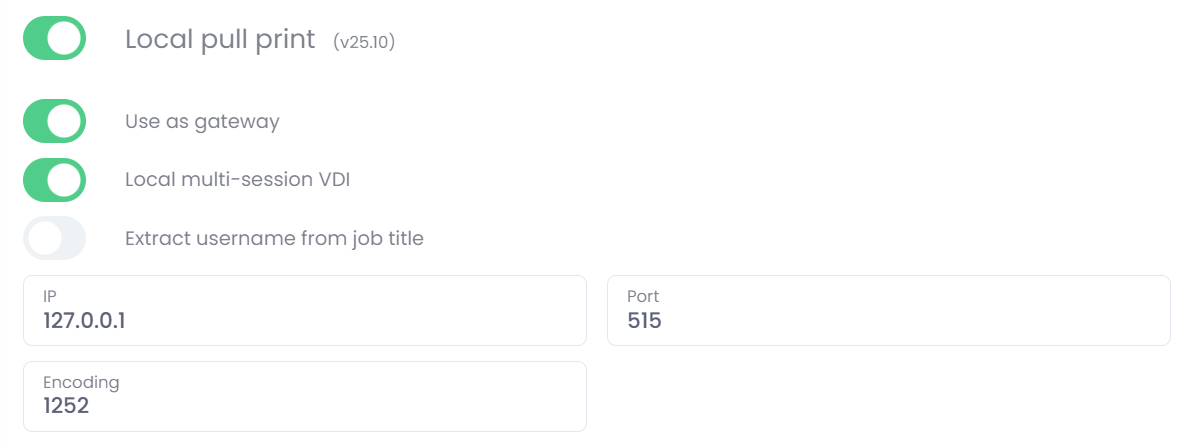
Enable Gateway mode and Local multi-session VDI in OCN settings.
-
Next, ensure that only one user‑specific print connector is configured in the company. This connector serves as the storage used for print job spooling.
-
Finally, manually configure the printer to point to the OptimiDoc Cloud Node (OCN).
Printer Configuration
To configure the printer, follow these steps:
-
Open Devices and Printers
Open Devices and Printers from the Start menu
(for example: Start Menu → Settings → Devices → Printers & scanners)
or open it directly from the Control Panel. -
Add a Printer
Click Add printer or scanner.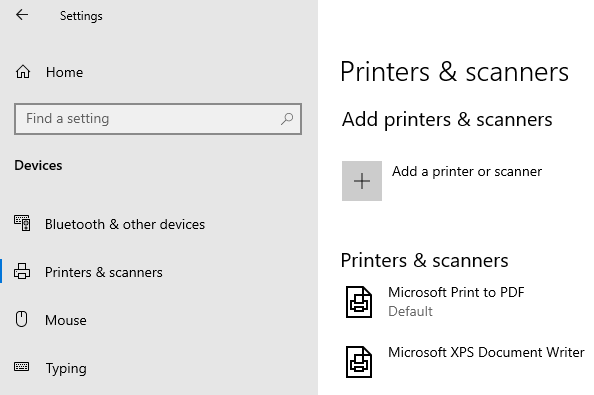
-
Select Manual Printer Setup
When Windows starts searching for printers, do not wait for the search to complete.
Click The printer that I want isn’t listed.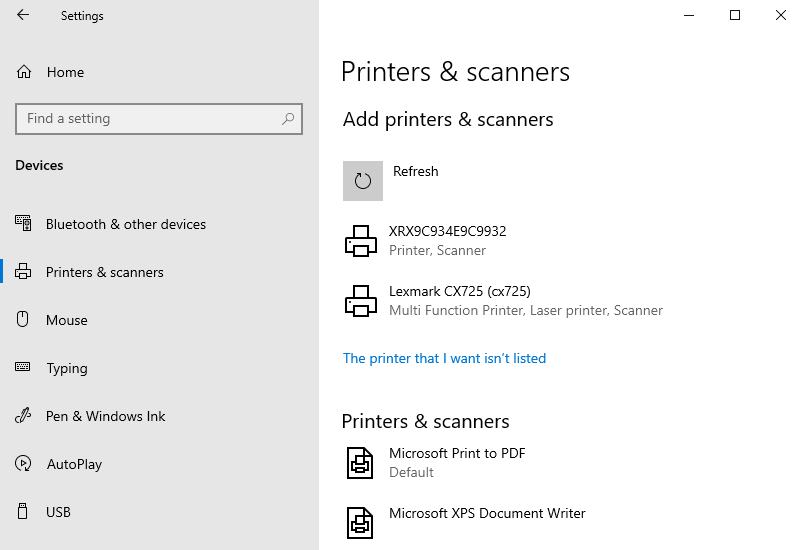
-
Choose TCP/IP Installation
In the Add Printer dialog, select Add a printer using a TCP/IP address or hostname, then click Next.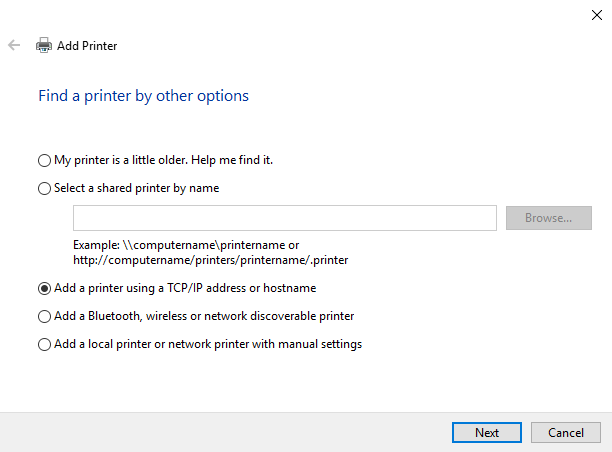
-
Configure TCP/IP Settings
-
Set Device type to TCP/IP device
-
Enter the IP address of the OptimiDoc Cloud Node (OCN) in the Hostname field
-
Leave the Port name automatically generated or enter a custom name
Click Next to continue.
-
-
Select Custom Device Type
Choose Custom under Device Type and click Next.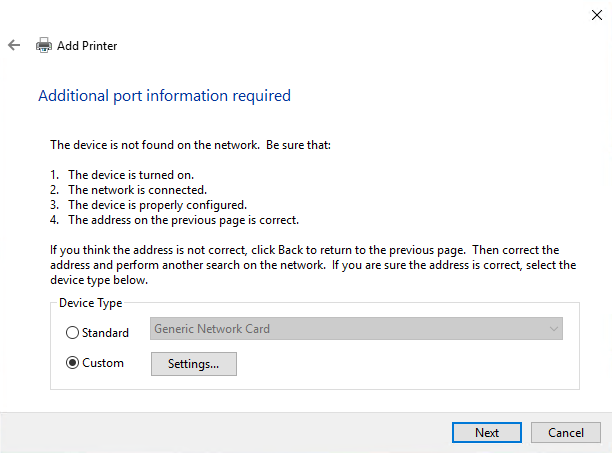
-
Configure LPR Protocol
-
Set Protocol to LPR
-
Enter OptimiDoc as the Queue name
Click OK to continue.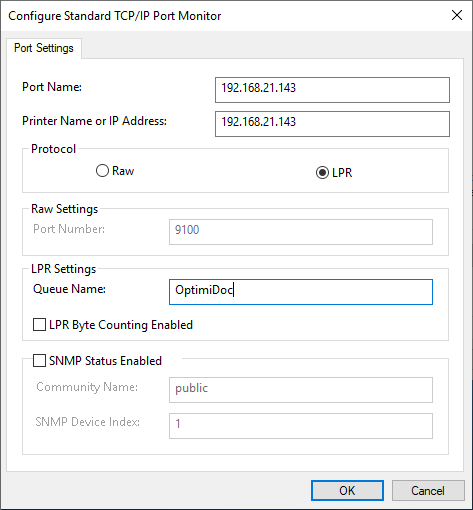
-
-
Select Printer Driver
Choose the appropriate printer driver from the list.
If the driver is not available, click Have Disk and browse for the driver file.
Click Next.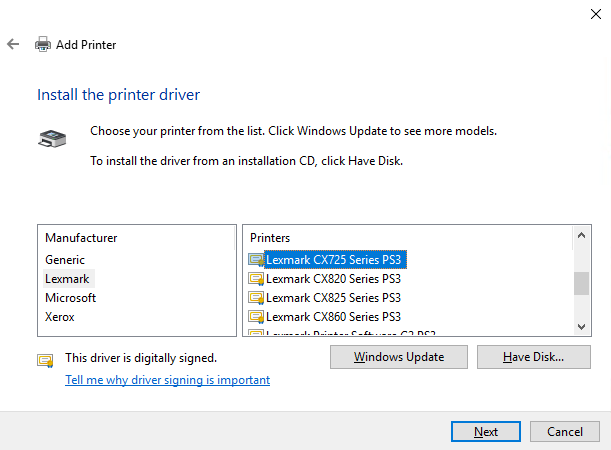
-
Name the Printer
Enter the printer name and click Next.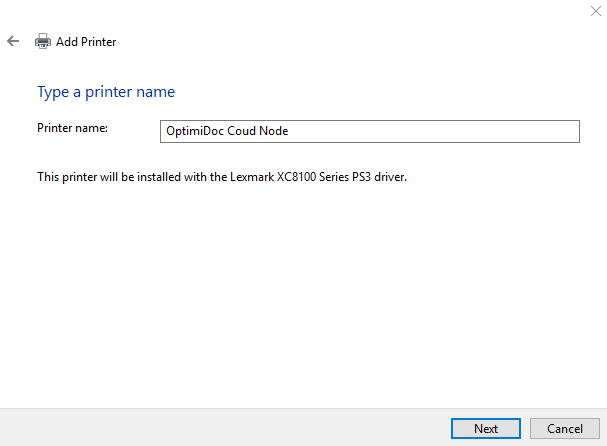
-
Sharing Settings
Select Do not share this printer, then click Next. -
Finish Installation
Optionally, click Print a test page to verify the configuration.
Complete the installation by clicking Finish.