This section shows how to configure the device authentication. If you do not want to lock the device, proceed to the print&scan application configuration section (Sharp - Print&Scan application configuration ).
Card reader support is automatically enabled when the OptimiDoc Authentication app is configured.
OptimiDoc Authentication application supports Elatec and inePro readers.
-
Open the printer’s web interface and sign in as an administrator.
-
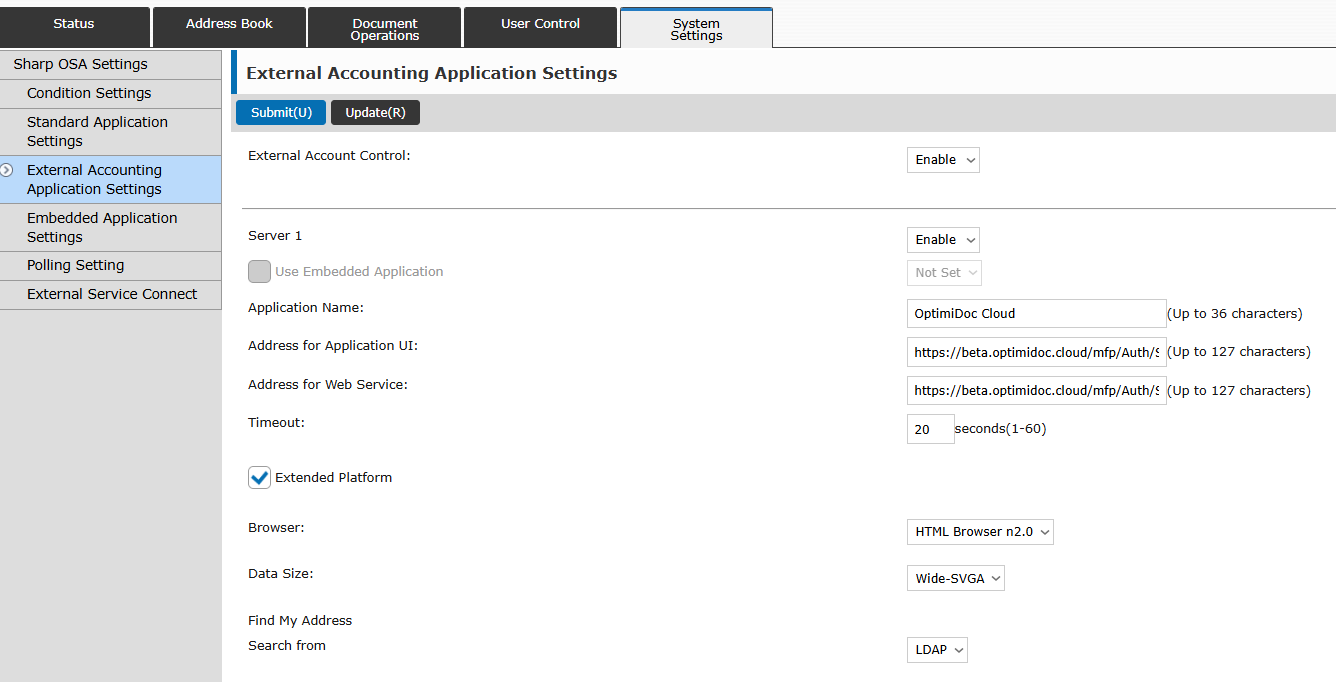
In the System Settings section, select Sharp OSA Settings > External Accounting Application Settings from the menu.
-
Enable External Account Control.
-
Enable Server 1.
-
Set Application Name to OptimiDoc Cloud.
-
For Address for Application UI use the following URL:
https://<datacentre>.optimidoc.cloud/mfp/Auth/Sharp/Login?code=COMPANY-IDENTIFICATION-CODE&sn=SHARP-SERIAL-NUMBER&lang=<lang>
<datacentre> parameter in the URL should be replaced with a real value.
A list of data centres can be found here: Geolocations of Datacentres
<lang> parameter in the URL should be replaced with a real value.
The following values are accepted: cs, en, de, es, fr, hr, hu, pl, pt-BR, nl.
-
For Address for Web Service use the following URL:
https://<datacentre>.optimidoc.cloud/mfp/Auth/Sharp?code=COMPANY-IDENTIFICATION-CODE&sn=SHARP-SERIAL-NUMBER
<datacentre> parameter in the URL should be replaced with a real value.
A list of data centres can be found here: Geolocations of Datacentres
-
Enable Extended Platform.
-
Scroll all the way down and click Submit.
-
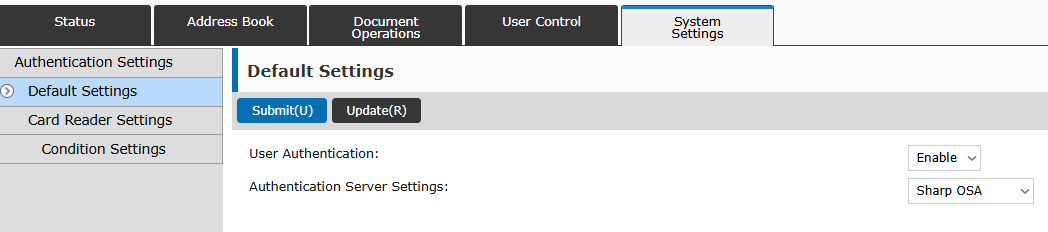
In the System Settings section, select Authentication Settings > Default Settings from the menu.
-
Enable User Authentication.
-
As Authentication Server Settings select Sharp OSA.
-
Optional: Check “Use IC Card for authetication“.
Check this only if the card reader is installed.
-
Scroll all the way down and click Submit.
-
Enable the MFP: OptimiDoc Cloud application enablement.